on
n8n automation with python
I recently discovered this awesome new tool for automation called n8n. It is best described as a graph editor for creating automation pipelines. These can be created using the outrageous number of built-in nodes like Google, Microsoft, AWS suite, PayPal, Notion, GitHub, and so much more. The creators of the tool state that there are more than 500 integrations! But the most important are the AI nodes, which you can use to build chains of decisions and actions with all the new and shiny GPTs. The number of creative use cases is unimaginable. In this post, I will expand on the first example you see after setting up the tool. Installation is very straightforward. You just need to follow the instructions provided in the self hosting guide.
Taking a Look at the Provided Example
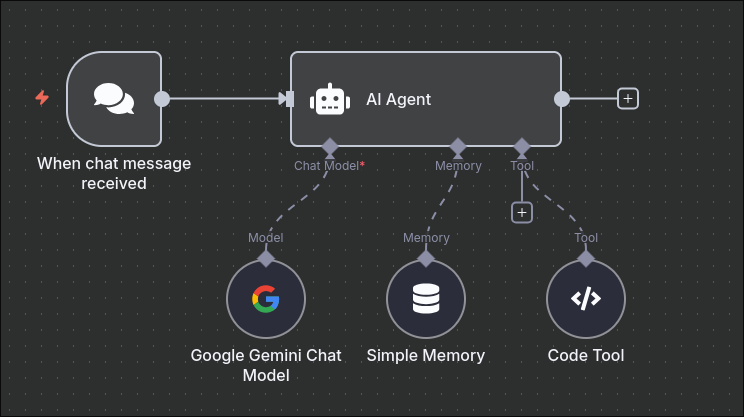
Here is the simplest AI chat example you can create. This setup doesn’t need a single line of code; you just need to add the model API key. I went with Google, as its free tier has generous limits (up to 1000 requests per day!). You can log in and get your key on the Google AI Studio site. Just click the “Get API key” button in the top right. After editing the model node and setting the key, you can start a chat.
More About the Tools
In the image, you can see that I already added the code tool node. Tools can be used to perform actions like searching the web, running commands, or, in this example, running Python code. Tools are run automatically when the model decides to do so. Every tool has two important properties: description and action. In n8n, it looks like this:

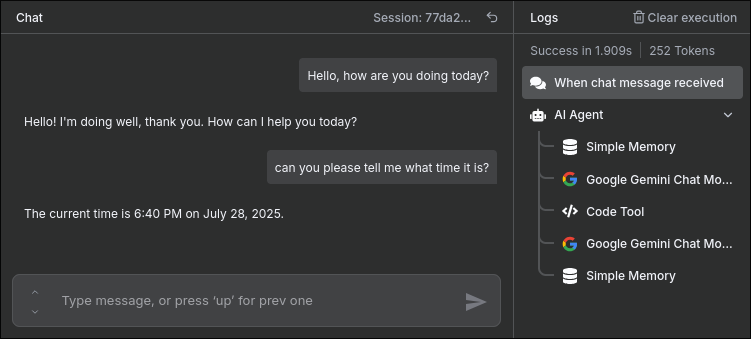
Here you can see the tool in action. The second message hinted to the model that it needed to use the tool, which it did, getting the current time by running Python’s datetime.now(). You can also see on the right that the Code Tool node has been run.
What Is the Memory Node?
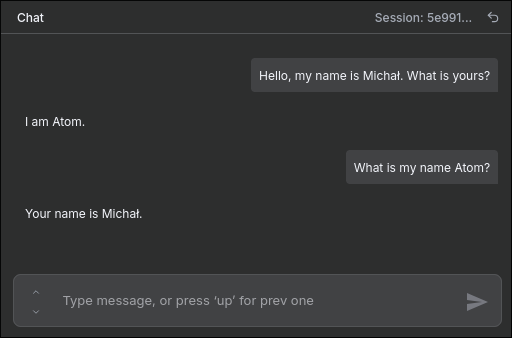
So you probably noticed the memory node. It is there so that the agent can “remember” previous messages. Usually, when we use ChatGPT, we are not thinking about how it works under the hood. You may think that the model you are talking to remembers previous messages, but this is only an illusion. In reality, every time you send a message, previous messages are appended before it as “context”.
And here is what is really being sent to the model:
First message:
System: You are helpful assistant "Atom", you reply quick and short.
Human: Hello, my name is Michał. What is yours?
AI: I am Atom.
Second message:
System: You are helpful assistant "Atom", you reply quick and short.
Human: Hello, my name is Michał. What is yours?
AI: I am Atom.
Human: What is my name, Atom?
AI: Your name is Michał.
So, the memory node in n8n is used to keep track of messages. It automatically appends history to each chat instance by using sessionID. In the node settings, you can set the Context Window Length, which just sets how many previous messages are appended to each new message.
How About Python
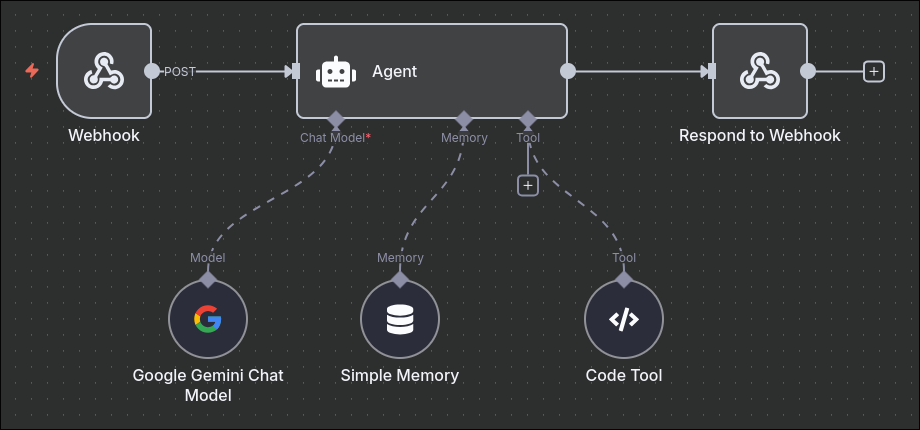
After playing with the provided AI chat example, I quickly wanted to escape from the limits of the UI. Fortunately, n8n has very good integration with webhooks, so there is no need to use some weird APIs—we can create our own. You can see that overall, not much changed. I removed the When chat received node and added Webhook and Respond to webhook nodes.
Now we need some Python code to send the POST request to a specified address. This is easily done using the requests package.
import requests
import json

def sendData(data):
    response = requests.post(
        url="http://localhost:5678/webhook/1c844166-8210-403a-8843-7519134d22c5",
        headers={"Content-Type": "application/json", "Authorization": "Bearer your-token"},
        data=json.dumps(data)
    )

    if response.status_code == 200:
        print(response.json()[0]['output'])
    else:
        print(f"Error: {response.status_code} - {response.text}")
This code is pretty much self-explanatory. We use requests.post to send a POST to the provided url. Headers are needed so that n8n does not block the request. After that, we check for a response: if the request is successful (code 200), we print the response to the screen; otherwise, we print the error.
I previously explained the importance of memory. To handle it in Python, we need to create the sessionId and keep track of it when sending messages.
import uuid

sessionId = str(uuid.uuid4())
print("session ID =", sessionId)
The last step is to format the data in an appropriate way and use the sendData function.
text = input()
while text != "quit":
    form = {
        "data": text,
        "sessionId": sessionId
    }
    sendData(form)
    text = input()
Setting Up n8n
We are almost at the finish. Now we just need to set up the agent and memory nodes. The agent needs to receive the correct value from the webhook request. You can drag and drop from the preview, or type `` (highlighted in green) in the Prompt.
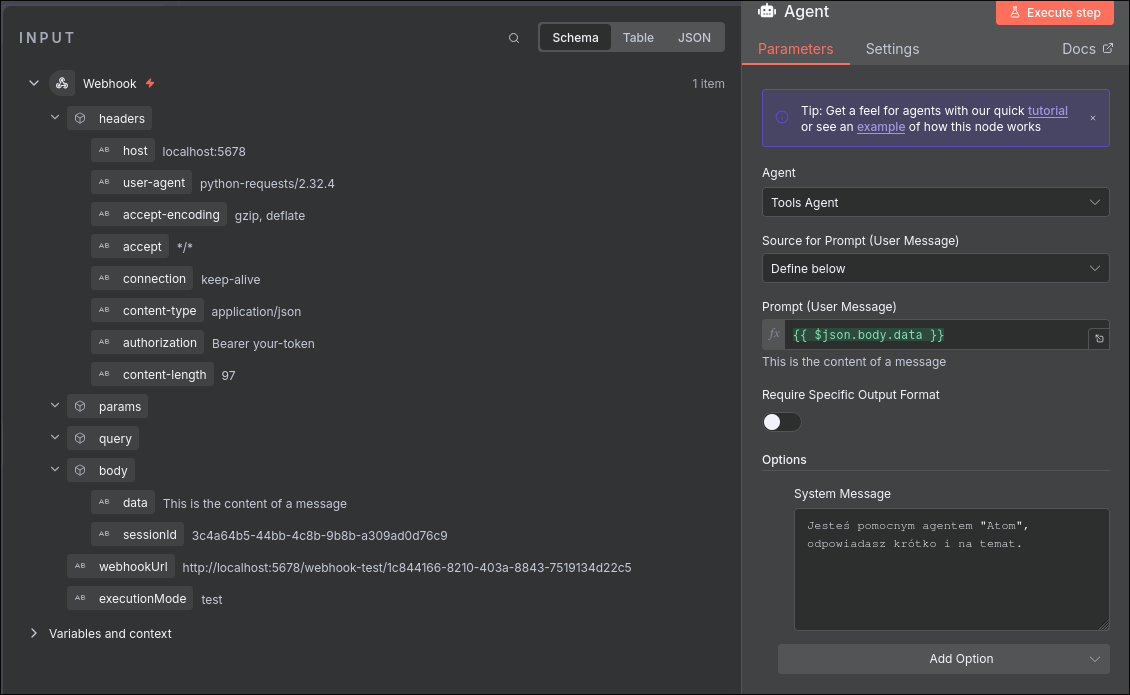
And now for the Memory node. In the Key value, type ``—this refers to our custom webhook field sent by Python.
Result
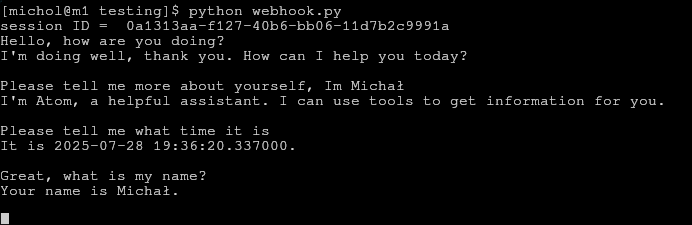
Here you can see the result. As you can see, everything worked. The model remembered my name and called the tool successfully.
Full Code
import requests
import json
import uuid

def sendData(data):
    response = requests.post(
        url="http://localhost:5678/webhook/1c844166-8210-403a-8843-7519134d22c5",
        headers={"Content-Type": "application/json", "Authorization": "Bearer your-token"},
        data=json.dumps(data)
        )

    if response.status_code == 200:
        print(response.json()[0]['output'])
    else:
        print(f"Error: {response.status_code} - {response.text}")

sessionId = str(uuid.uuid4())
print("session ID = ", sessionId)

text = input()
while text != "quit":
    form = {
            "data": text,
            "sessionId": sessionId
            }
    sendData(form)
    text = input()
Thoughts
This simple example could be done without the use of n8n by taking advantage of OpenAI or Google built-in agent utilities that can be accessed via API. But this setup is arguably simpler and more scalable. In the next posts, I will be experimenting with integrating vosk for speech-to-text synthesis.