on
CSI Camera in python - Jetson Nano
This week I started working on camera integration for my Jetson Nano powered autonomous car project. I never anticipated that something like this would cause me so much pain and trouble. In this post I compressed all the required knowledge to start developing with CSI camera on Jetson Nano with python cv2.
Selecting supported sensor
The first step to ensure that your camera will be working smoothly with Jetson, is to select one of the two officially supported sensor types that is IMX219 or IMX477. There is a lot of confusion regarding other sensors as this Nvidia page has other sensors listed, but I would strongly suggest picking IMX219 or IMX477 as you will see later there will be less issue setting those up. I selected ArduCAM IMX219 Wide Angle Camera Module
Other sensors
Using other sensors is possible but would mean taking additional steps:
- Device tree configuration - recompiling and flashing the device tree
- installing V4L2-compliant driver from the supplier
- Ensuring proper CSI-2 lane configuration
This tutorial wont cover those. You can read more here
 If you look at the graph above both
 IMX219 and IMX477 will use the built in Tegra Drivers - marked in green on the right side, this means that the device will be recognized by the kernel and registered as /dev/video*. Then we will use libargus library via nvarguscamerasrc in our Gstreamer application to read the images. You don’t need to understand all those terms yet, but you’ll see them pop up in the next steps.
Computer vision in python
I will be using python to develop my camera integration, relying on the well known cv2 library. However, there is a problem, cv2 must be built with GStreamer support enabled, and the default version available on PyPI does not include this feature. Fortunately you don’t need to build it from source (but you can), instead we will use the SDK Manger to flash appropriate cv2 version directly onto the Jetson.
- Power on the Jetson
- Connect the Jetson to a host computer with SDK Manager running
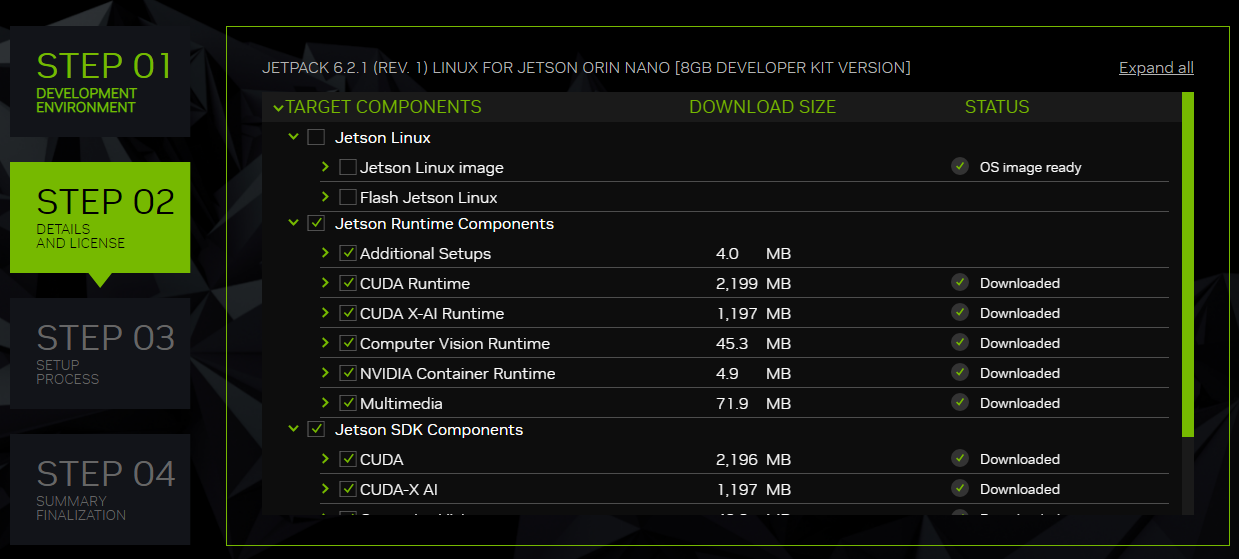
- Go to the Step 2
- Uncheck “Jetson Linux” and check “Jetson Runtime Components” and “Jetson SDK Components”
Note: If you updated the Jetson system beforehand using
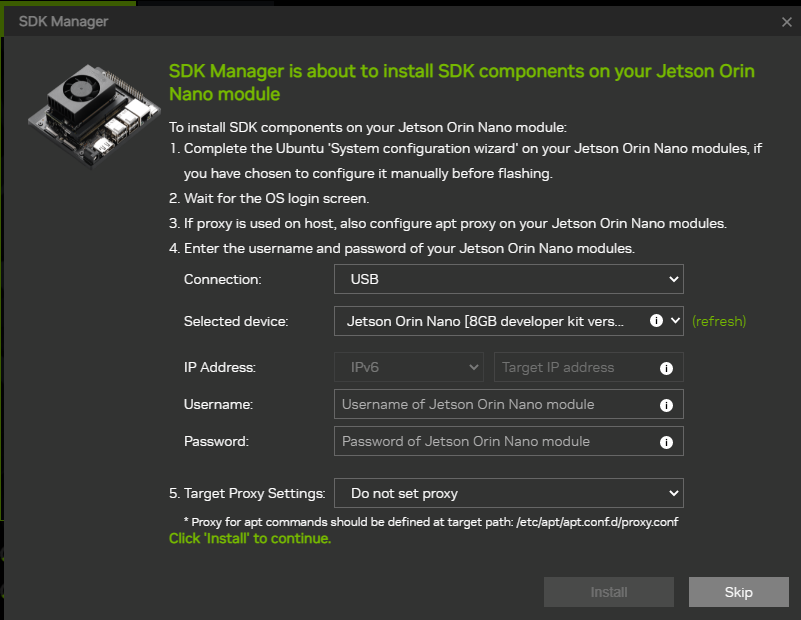
sudo apt upgrade, you probably updated the linux kernel. This causes version mismatch with the Jetson Runtime Components. You have to flash the Jetson Linux again or revert the update if you set up some kind of system snapshots. - In the installation screen provide your user credential and click “Install”
Note:
If you have just flashed the system, make sure to boot the device and complete the initial setup. For the SDK Components installation to succeed, you must have already created a user account. - Reboot the device and you should be ready to go
Important!
After flashing the Jetson Runtime components DO NOT update the system. Doing so could break the installed components, and you will need to flash your entire system again.
Checking if the camera is working
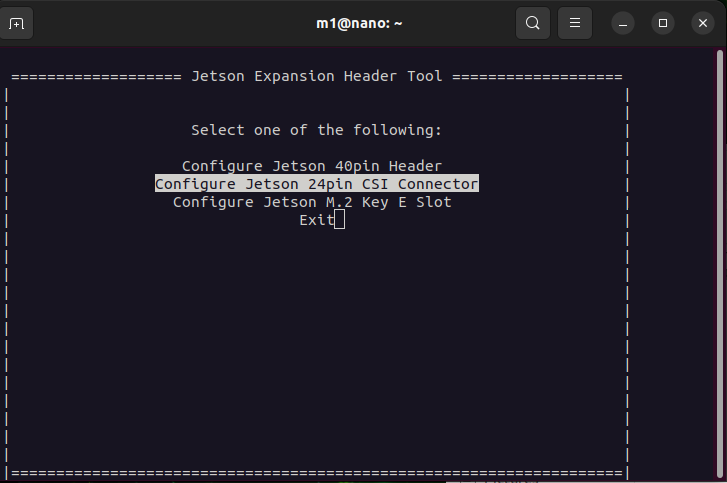
Connect the camera with the ribbon cable while the Jetson is powered off. Then power on the device and in the terminal run:
sudo /opt/nvidia/jetson-io/jetson-io.py
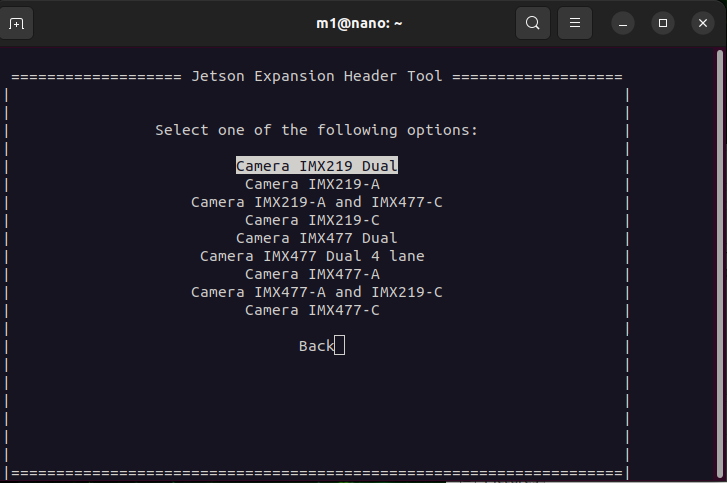
You should see a screen like this, select “Configure Jetson 24pin CSI Connector”
And then “Configure compatible hardware”. After that pick the first option “Camera IMX219 Dual”, even when running single camera - its easier that way. If your setup differs select accordingly.
Finally choose “Save pin configuration and reboot”. After the device powers on check if the device is detected:
ls /dev/video*
you should see text /dev/video0. If nothing appears system did not find your camera, check if it is correctly connected and troubleshoot the issue in the journalctl.
To see the camera working execute command
nvgstcapture-1.0
You should see the window with camera view pop up.
Controlling the camera pipeline
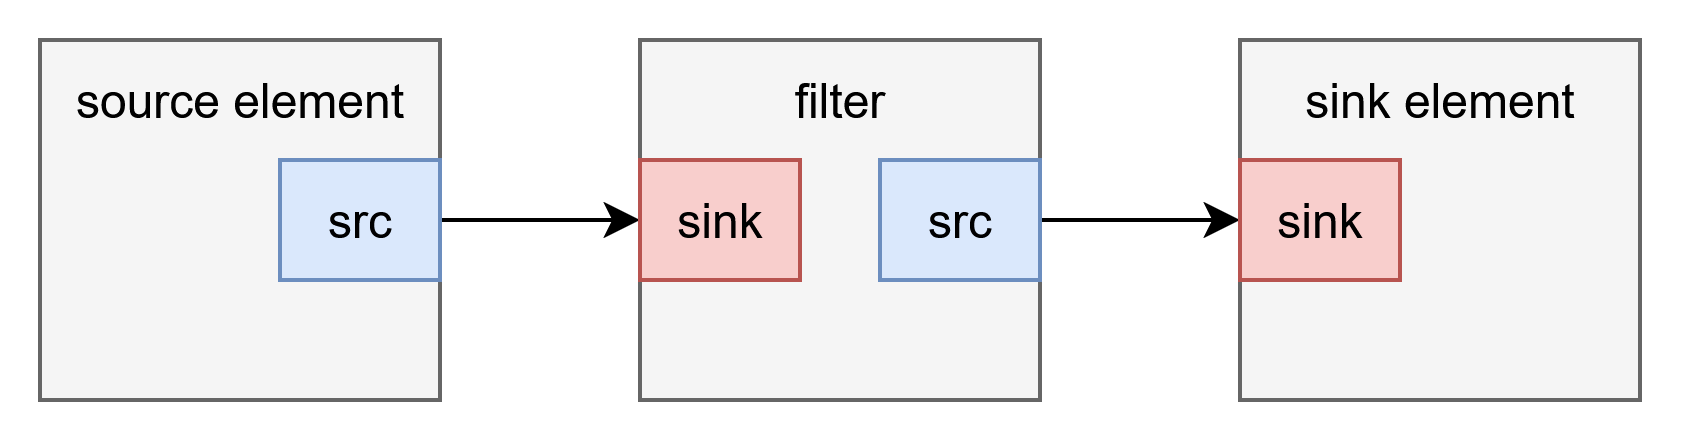
To control the properties of the recording like resolution, FPS, encoding type and more we will be using custom gstreamer pipeline. Pipeline consists of source element, filter (optionally) and sink element.
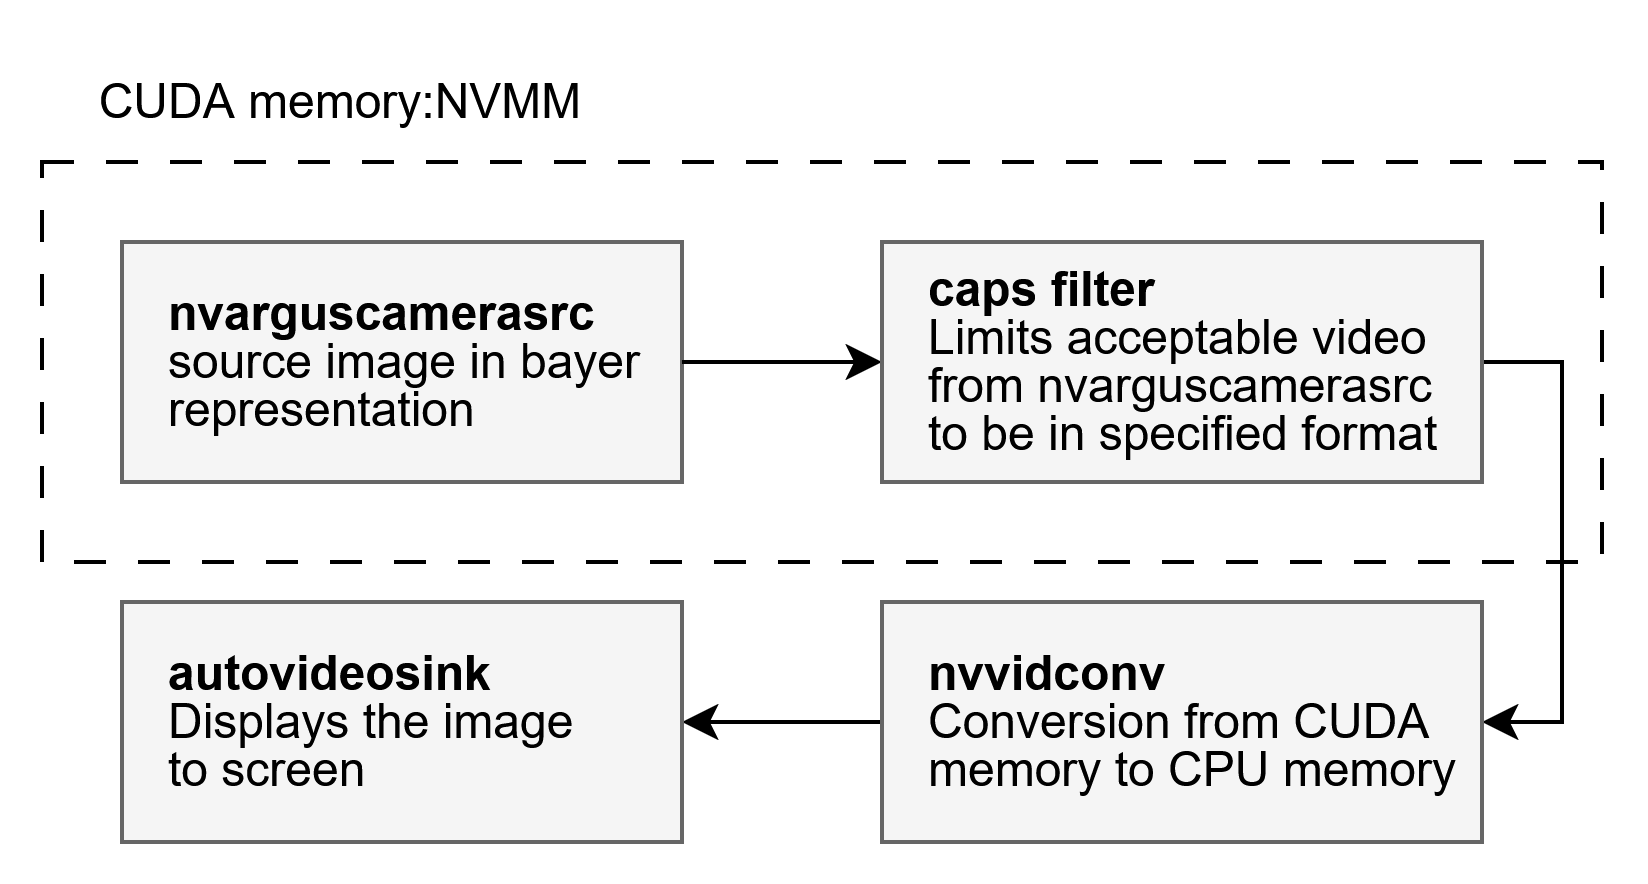
 As the source element we will be using
 nvarguscamerasrc - you can scroll back to the camera architecture stack diagram I showed before and find it there. To display the image to the screen we can use autovideosink. And those are the very basics of a gstreamer pipeline. To launch the pipeline use gst-launch-1.0 command.
3280x2464/21fps
gst-launch-1.0 nvarguscamerasrc ! 'video/x-raw(memory:NVMM),format=NV12,width=3280,height=2464,framerate=21/1' ! nvvidconv ! autovideosink
each element is separated by ! symbol. the 'video/x-raw(memory:NVMM),format=NV12,width=3280,height=2464,framerate=21/1' caps filter specifies to the nvarguscamerasrc what properties should the image have. You can edit this to achieve different effects / match the sensor properties.
1640x1232 / 30fps
gst-launch-1.0 nvarguscamerasrc ! 'video/x-raw(memory:NVMM),format=NV12,width=1640,height=1232,framerate=30/1' ! nvvidconv ! autovideosink
 You should see the window appear on screen.
Gstreamer pipeline in Python
The pipeline we designed before is almost ready. Only missing step is correct video format for cv2. You can see all the formats supported by opencv gstreamer integration. The easiest one to work with is BGRx lets edit the pipeline to end up with this format in the sink element. Speaking of which we will also be using different one. We do not want to display the image to screen but instead pass it to the python application. To do that use appsink. Final pipeline will look like this.
import cv2

gst_pipeline = (
    "nvarguscamerasrc ! "
    "video/x-raw(memory:NVMM),width=1640,height=1232,framerate=15/1,format=NV12 ! "
    "nvvidconv ! "
    "video/x-raw,format=BGRx ! "
    "appsink drop=true max-buffers=1 sync=false"
)

cap = cv2.VideoCapture(gst_pipeline, cv2.CAP_GSTREAMER)

while True:
    ret, frame = cap.read()
    if ret:
        cv2.imshow("Image", frame)
        if cv2.waitKey(1) == ord("q"):
            break

cap.release()
Keep in mind that this example is bare minimum. I will explore more complex examples and saving frames to disk in next posts.