on
Getting started with AI image generation
I’ll walk you through the basics of Stable Diffusion, breaking down what it is and how you can use it to generate your own images.
Before we begin
This post is aimed at beginners, but if you’ve previously worked with Stable Diffusion, you’re also welcome!
What is stable diffusion
Stable Diffusion is a deep learning model designed for text-to-image generation. Under the hood it has been trained to progressively denoise images that start out as pure noise. This means that model given image of 100% noise can “imagine” what original image looked like (this is called latent diffusion). If you want to know more about it be sure to check out the wiki.
Running a Stable Diffusion model can be quite resource-intensive, so to generate images on your machine you need to have a strong GPU. The most important aspect is VRAM or virtual ram. I would say that 6 GiB is a miminimum. You can easily find your GPU specifications online. The more VRAM you have, the better, as the model needs to be fully loaded into memory to run. Without getting into details lets justs say that some of models are pretty big.
How to generate images
OK, so you have a right GPU, now you need the right tools. If you did some research, you probably found those two:
First one is simple web interface for running models, it is pretty easy to get started, and library of extentions and big community is great. ComfyUI is more specialised, it is very different then Automatic1111. You build your own generation profile by connecting nodes. This gives you very much controll over the result, but is hard for newcomers. As great as those tools are I wouldn’t call them hassle free. So if you want to go the easy way check out this Krita plugin:
There’s a trade-off to consider here between control and ease of use. If you just want to start I recommend a Krita plug-in, then if you ever feel constrained by the tool go for Automatic.
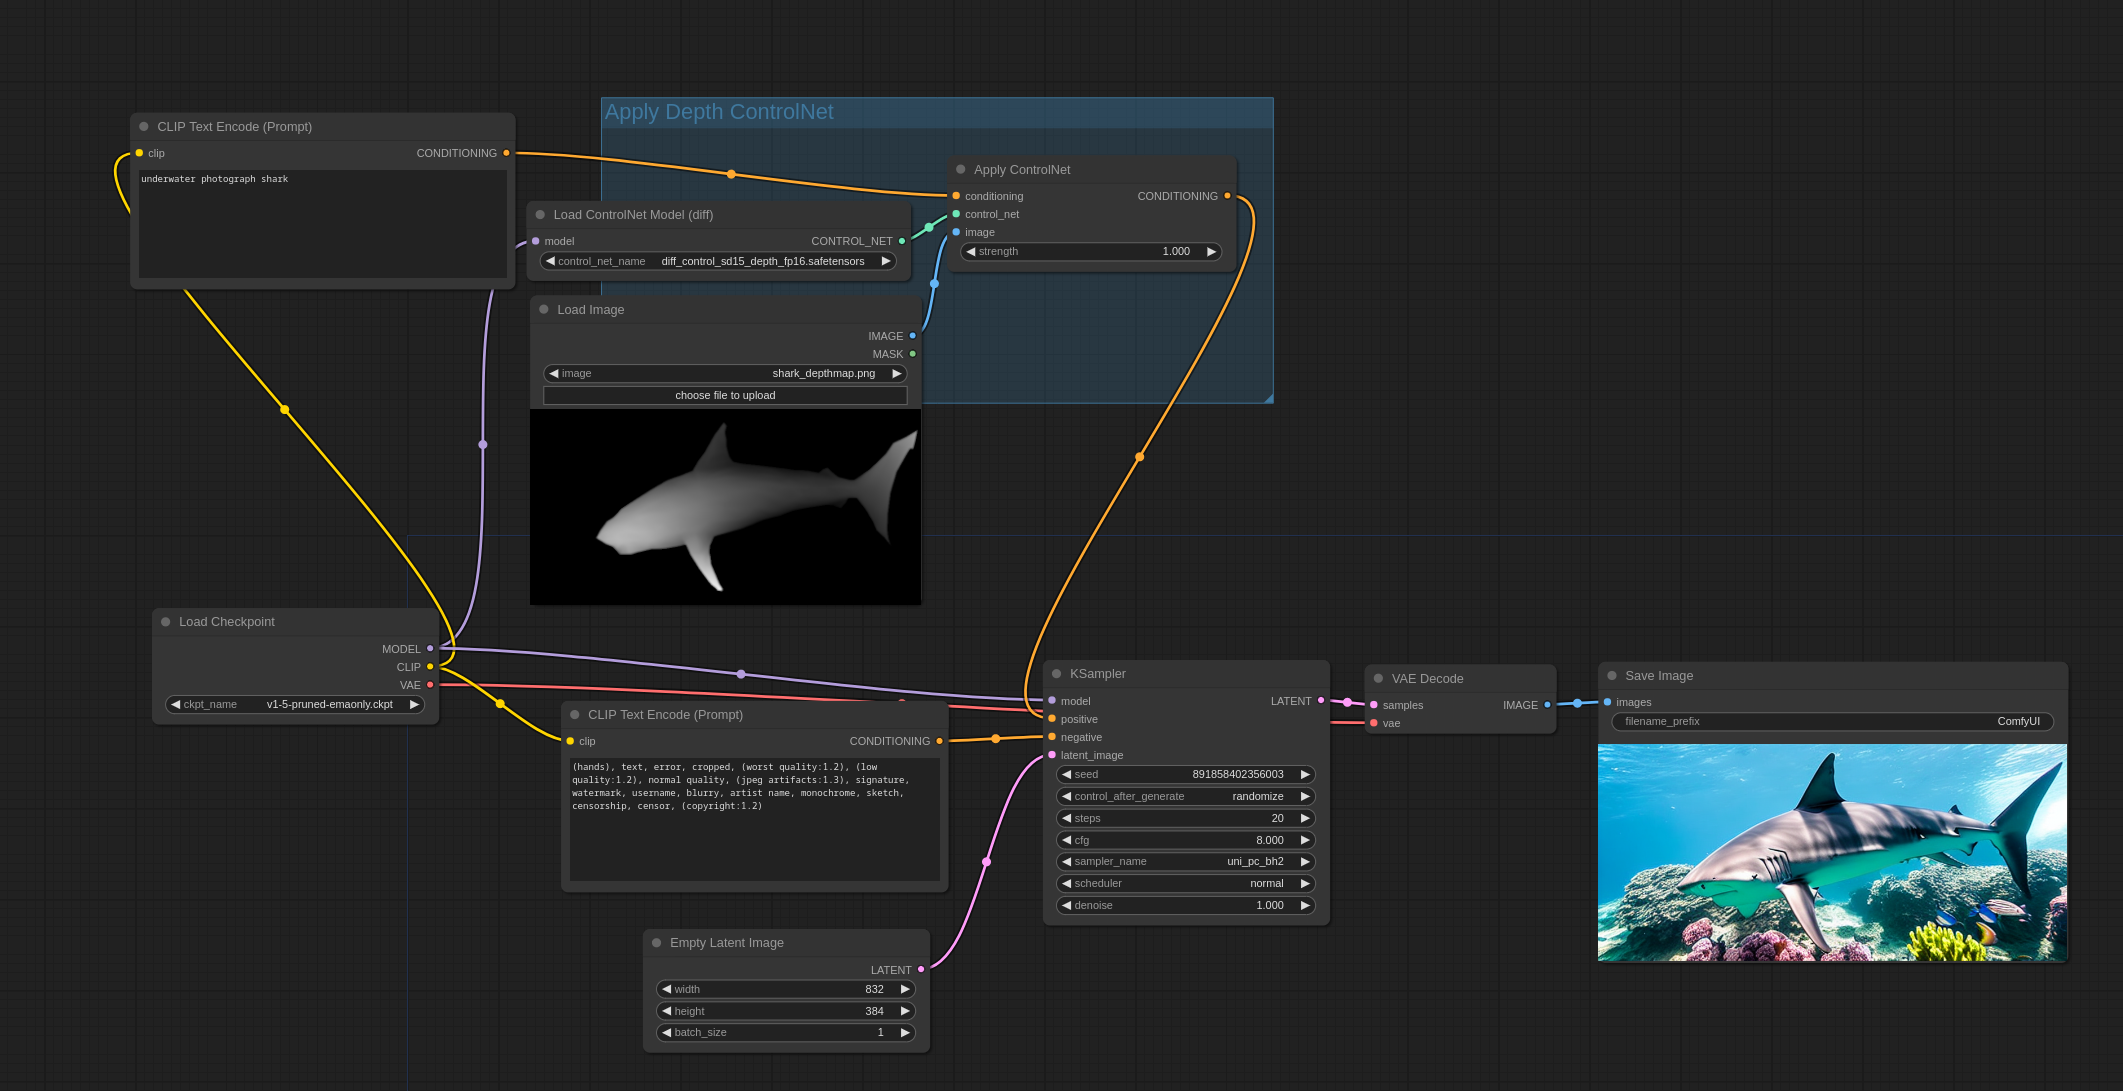
Comfy on the other hand is great for building more complex workflows. Just look at this example, it features ControlNet model that analises black and white deph map before image generation.
 Comfy UI workflow with ControlNet
Just to clarify, this example is simple and thus also possible in other tools, but Comfy is just designed for aplications like this.
Installing
You probably chose your tool by now. Whatever it is I won’t get into detail about instalation. Just simply follow the instructions provided by creators:
First image
Before you generate an image you need a prompt. You usually have two prompts:
- Positive prompt
- Negetive prompt (not mandatory)
I think this is self-explanatory; positive is what you want and negative is what you don’t. Let’s try cinematic landscape, great mountain for positive, and negative you can leave empty for now. After you click generate, wait for the image to show up. In Automatic1111 you also have control of seed. By default, each generation you do sets a new random seed, this results in a very different image each time. But if you, for example, found a great camera angle or a good pose for your character, you can set seed to cnonstant value. The next images you generate will be similar to each other.
How to generate good images
Outside of different prompts you can also try different models (also called checkpoints). I belive every one of those tools come preinstalled with v1-5-pruned-emaonly.safetensors which is something… but if you want to get good results you’ll need a good model. In my opinion the best site to search for Stable Diffusion models is Civit.ai. I usually go for:
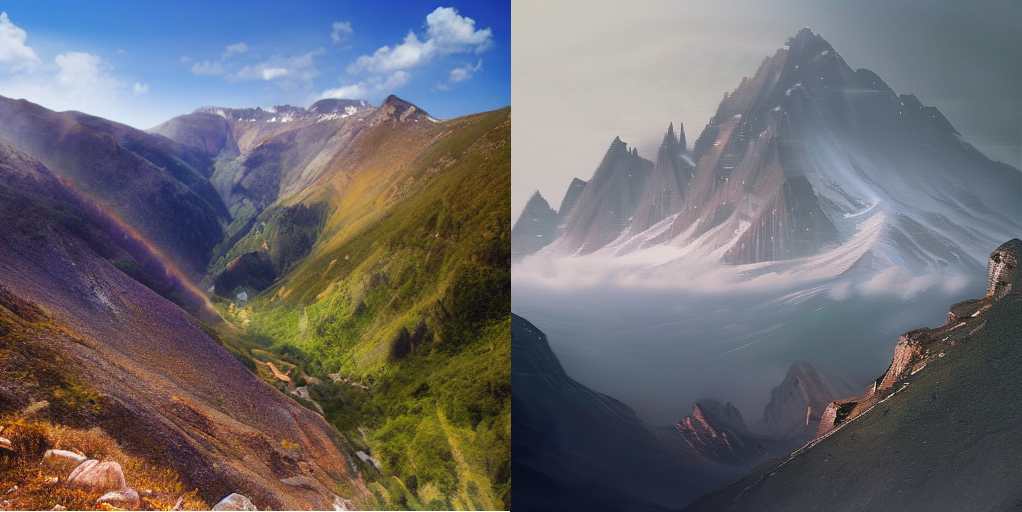
Even if you want to generate stylized images (I’ll get to that later) I advise you to get good realistic model first. Here is the v1-5-pruned-emaonly.safetensors vs Juggernaut XL (same settings), prompt used: cinematic landscape, great moutain.

You can see the diference between models.
Main settings
When generating images you have two settings that are the most important. You can find those for Krita by clicking gears icon
- Sampling rate
- CFG Scale
Sampling rate controlls how many times the model will “enchance” the image. More steps equals more quality, that is before the image becomes distorted. Some models can handel more steps before destorting the image. Also don’t forget that more steps means more time to generate. For me the sweet spot is around 45 - 75 depending on usecase.

CFG Scale is a parameter that conrolls how closely a model will follow your prompt. Usually you need to set it once, for every model. Usually in the 4 - 7 range rarerly more.

Images with style
If you want something more artistic or specific, you need to check LoRA’s. Lora (Low-Rank Adaptation) is a training technique for fine-tuning Stable Diffusion models. It is basicly a way for a model to understand new concepts or styles. All you need to do is download the additional small model and put it in corresponding folder. Here are some examples of loras:
- Lora for porche 911 - teaches model concept of specific car
- Il était une FOIS - Artistic style of the French educational animation.
You can also find those on CivitAI. If you want to read more about loras: Softwarekeep article
And that’s all
Not really. But you have very basic understending of core concepts. In the future I’ll create step by step guids for each tool, so look for the Tutorial tag in Tags