on
Google Coral with Raspberry Pi 5 - no Docker
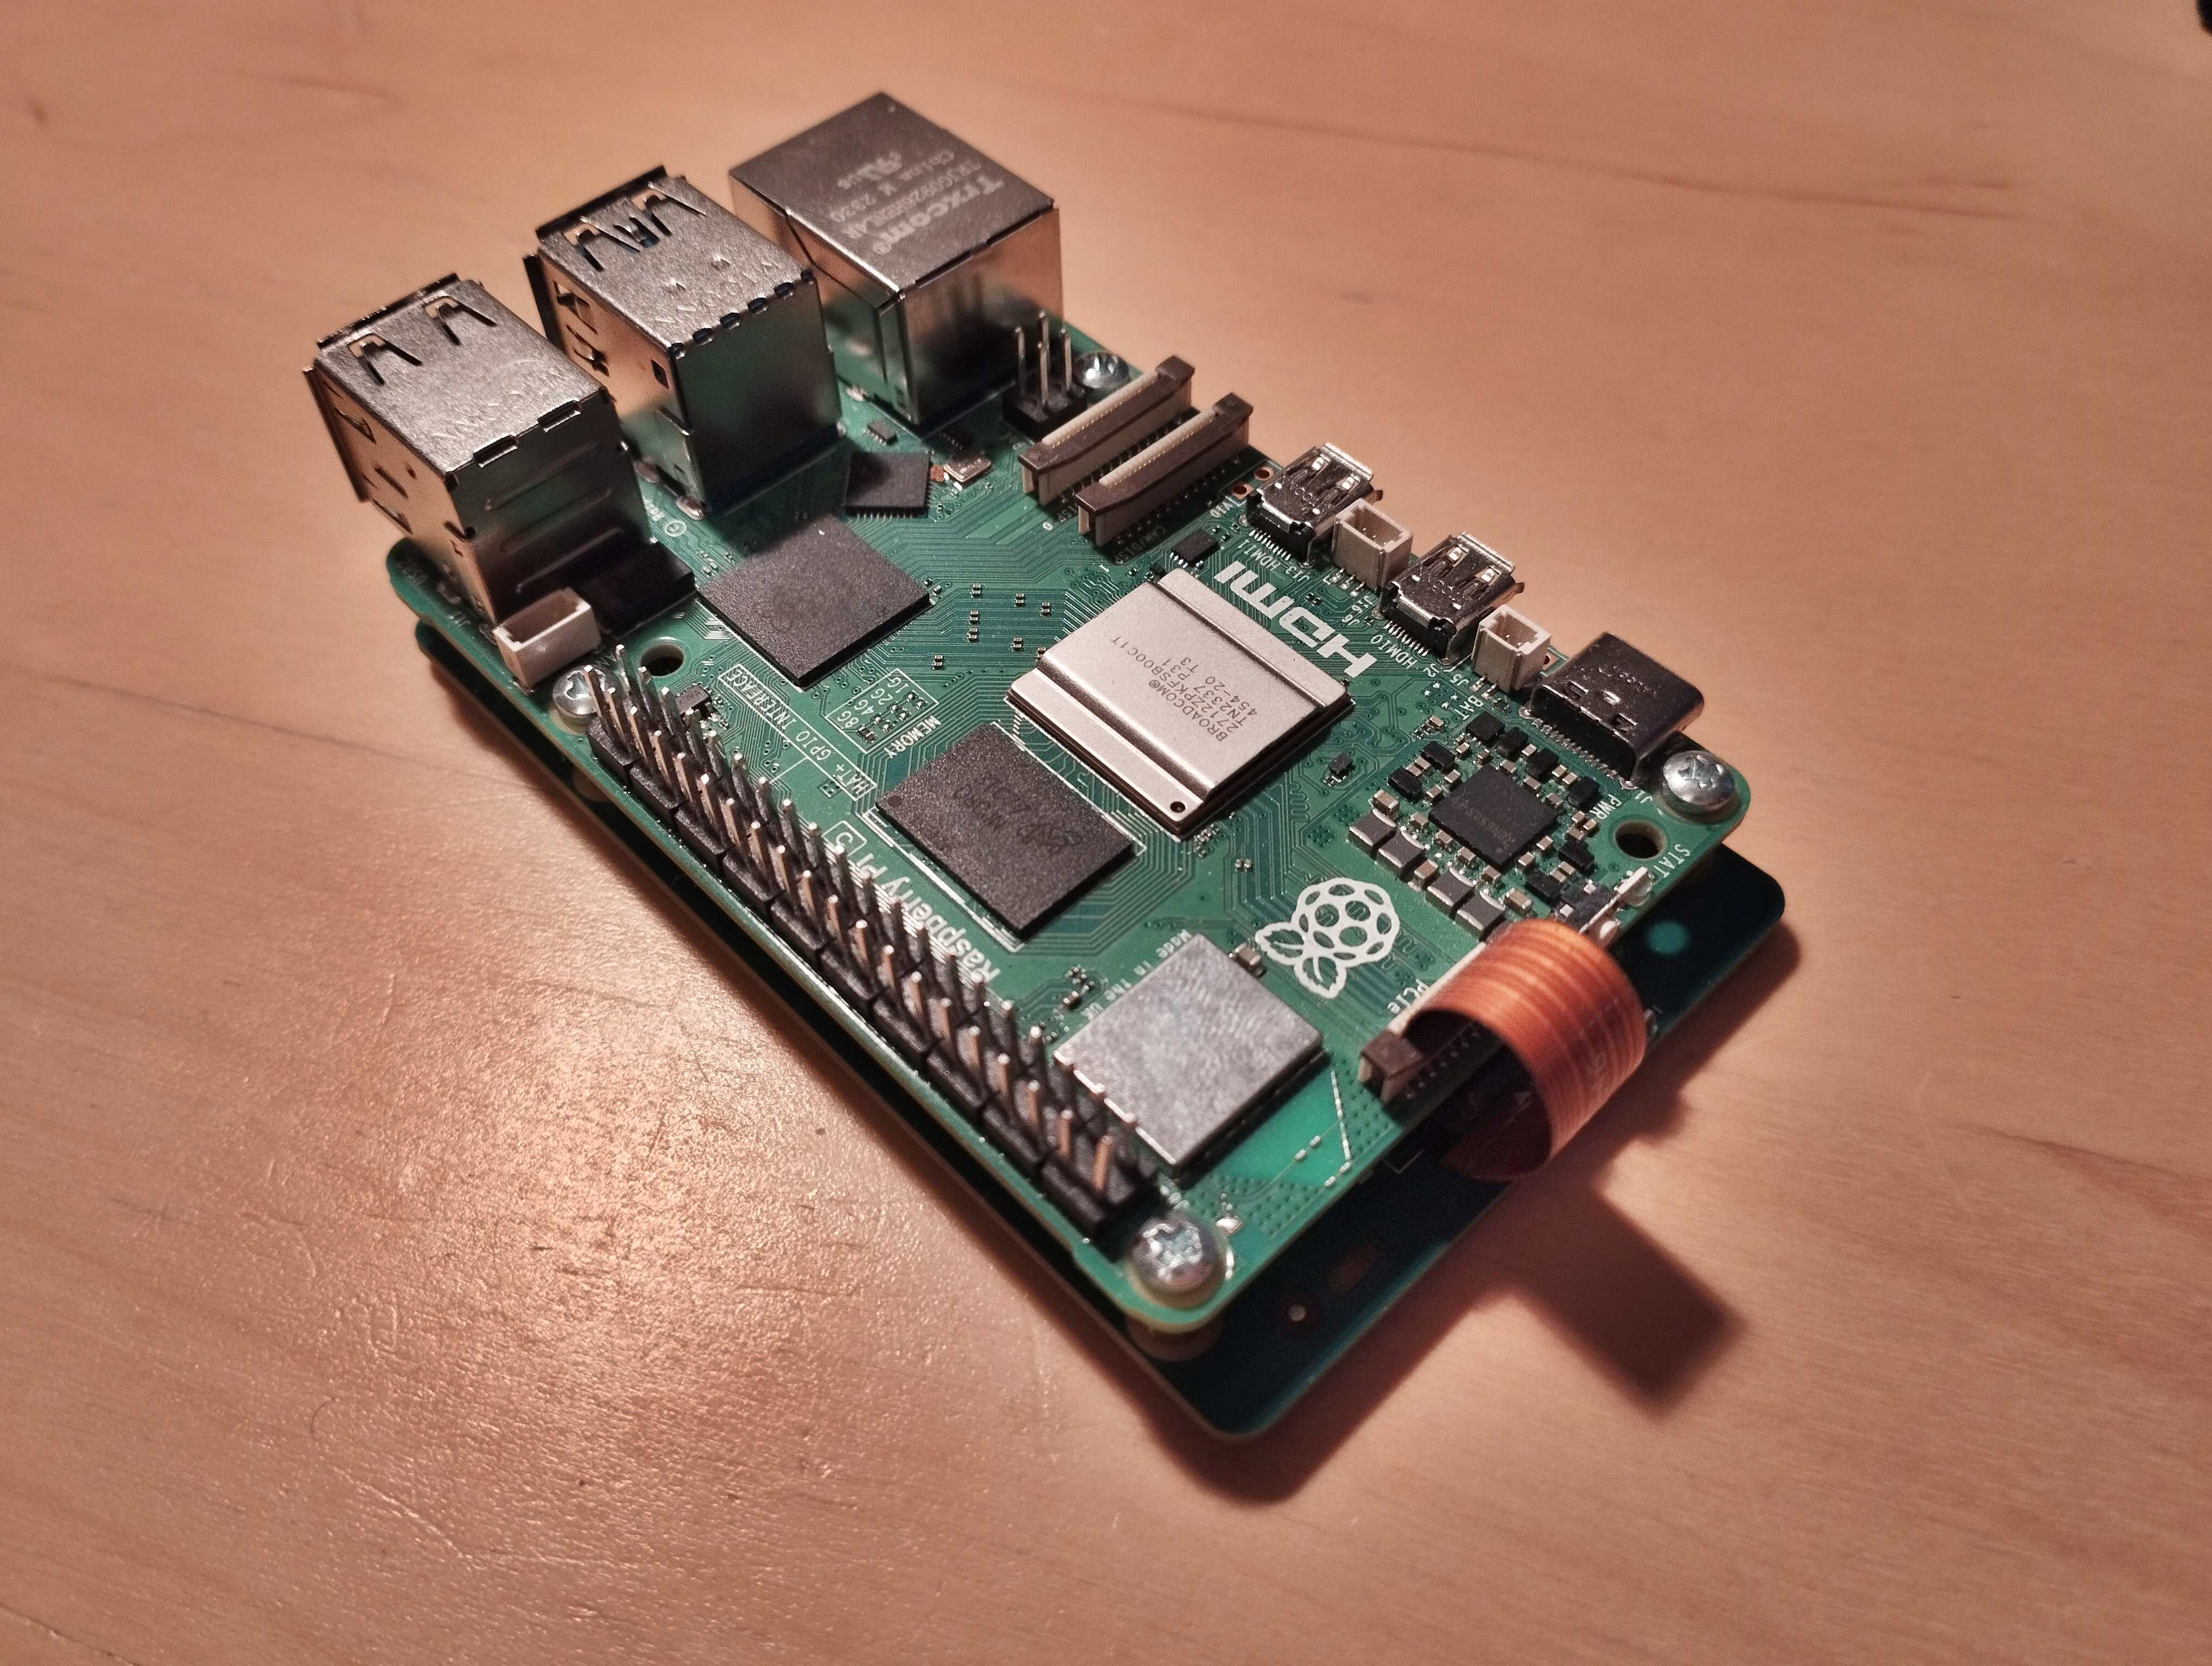
I will guide you from a fresh rpi5 operating system to a working Google coral device. This method does not make use of Docker, I made Google Coral work with bare metal RPI5. In my case RPI is running Raspberry pi OS Lite 64bit. I’m using M.2 PCIe version of an accelerater, with Pineboards hat. I can’t say this method will work with USB version too, but I don’t see why it wouldn’t.

General info
To make the accelerator work we need 4 things
- gasket-dkms driver
- libedgetpu library
- Tensorflow Lite - needed by pycoral
- pycoral
Unfortunately google stopped updating the needed libraries leaving us with two options:
- use the original version for old Tensorflow and python e.g. in Docker
- use the newer version continued by the community
Regarding point one, I recommend the excellent Jeff Geerling’s blog post he explains how to use Docker to make an “outdated” virtual machine inside rpi. The solution works but is not satisfactory for me. Looking for an alternative, I found the user feranick, who fixed bugs in the google repositories and built improved versions of gasket-dkms, libedgetpu and pycoral that work for the new version of Tensorflow (2.17) and python (3.11). All further instructions for point 2.
Technical
The gray text in the code blocks (preceded by #) indicates a general comment illustrating the operation of the command. Below you will find the command for my case, it may differ from your command, so be careful. If the commands are split with newline run them one by one.
Instructions
Before we start installing the drivers and libraries you need to make a few changes to the rp5 system. You can find detailed information and explanations of the run commands on the previously mentioned Jeff’s blog.
# Copy the entire block
sudo tee -a /boot/firmware/config.txt <<EOF
kernel=kernel8.img
dtparam=pciex1
dtparam=pciex1_gen=2
EOF

sudo sed -i '1 s/$/ pcie_aspm=off/' /boot/firmware/cmdline.txt
Reboot rpi
sudo reboot
To check if the correct kernel is loaded use
uname -a
We are only interested in the first part of Linux rpi 6.6.51+rpt-rpi-v8 and specifically the value after the dash in my case rpi-v8 means that kernel8 was loaded correctly. Now we change the device-tree, original instruction available here
# we create a backup dtb
sudo cp /boot/firmware/bcm2712-rpi-5-b.dtb /boot/firmware/bcm2712-rpi-5-b.dtb.bak

# Decompiles dtb (ignore errors)
dtc -I dtb -O dts /boot/firmware/bcm2712-rpi-5-b.dtb -o ~/test.dts

# Modify the file
nano ~/test.dts
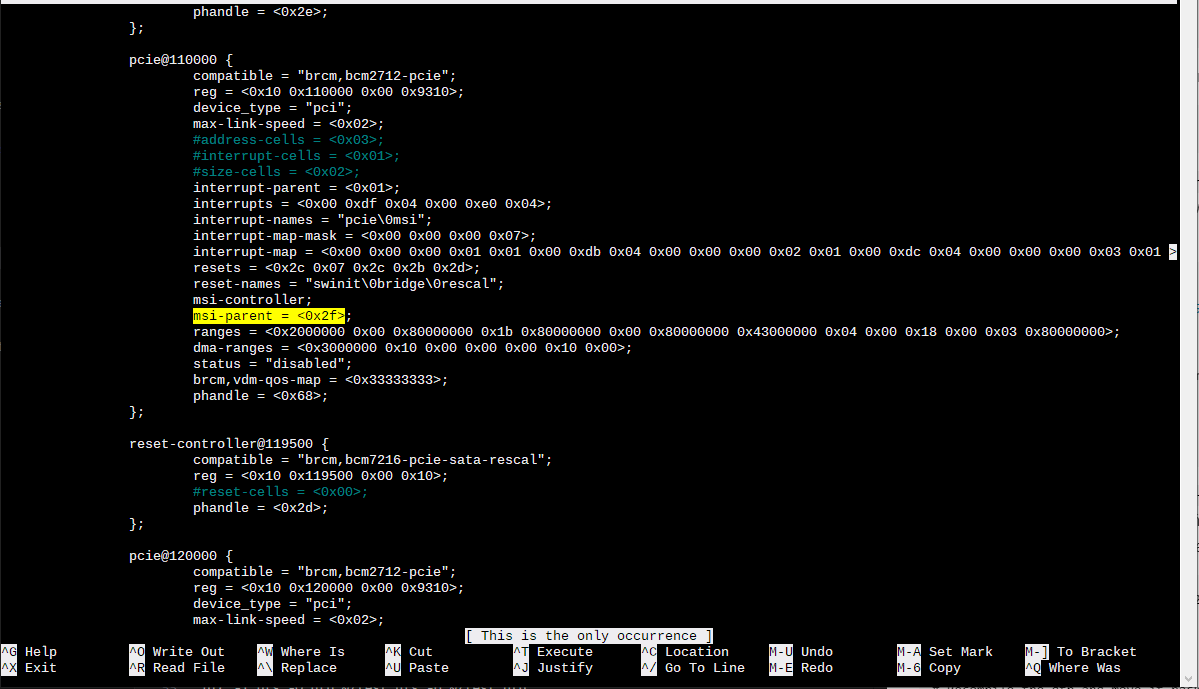
Now search for the lines msi-parent = <0x2f> e.g. using Crl+Q and typing the phrase. You should find yourself in the section labeled pcie@110000 scroll down and note the value of phandle (on the bottom). Enter the value of phandle to the value of msi-parent. In my case:
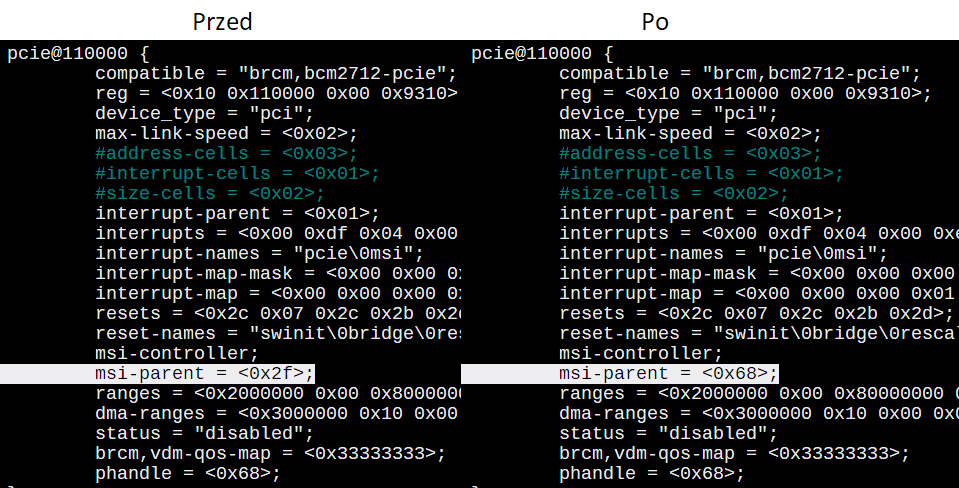
 The value of
 phandle is 0x68. Now we replace the msi-parent value with the phandle value.
 we exit by saving the file with
 Ctrl+X, Y, Enter. The last step is to recompile the tree.
dtc -I dts -O dtb ~/test.dts -o ~/test.dtb
sudo mv ~/test.dtb /boot/firmware/bcm2712-rpi-5-b.dtb
If an error appears mv: failed to preserve ownership ignore it.
sudo reboot
Phew the worst is over
Of course, if rpi reboots… We can move on to installing libraries.
sudo apt install git python3-pip
Now we will be downloading files so choose the folder in which you want to store them. Since I used os lite version I have to additionally create a folder in my case Documents.
# mkdir <LOCATION> && cd <LOCATION>
mkdir Documents && cd Documents/
Here are the necessary binary files that we will be downloading in the next step:
- Revised version of libedgetpu library
- Updated Tensorflow Lite
- Revised version of pycoral library and finished whl files
- Updated version of gasket-dkms driver
At the time of writing this tutorial, I am using the latest release for TF 2.17. In the future, see if a newer version is available.
wget https://github.com/feranick/libedgetpu/releases/download/16.0TF2.17.1-1/libedgetpu1-std_16.0tf2.17.1-1.bookworm_arm64.deb

wget https://github.com/feranick/TFlite-builds/releases/download/v2.17.1/tflite_runtime-2.17.1-cp311-cp311-linux_aarch64.whl

wget https://github.com/feranick/pycoral/releases/download/2.0.3TF2.17.1/pycoral-2.0.3-cp311-cp311-linux_aarch64.whl

wget https://github.com/feranick/gasket-driver/releases/download/1.0-18.2/gasket-dkms_1.0-18.2_all.deb
Now install the downloaded gasket-dkms and libedgetpu libraries.
# sudo apt install <./gasket-dkms> <./libedgetpu1-std>.
sudo apt install ./gasket-dkms_1.0-18.2_all.deb ./libedgetpu1-std_16.0tf2.17.1-1.bookworm_arm64.deb
Now we add our user to a new group apex to avoid problems with accessing the accelerator without sudo.
sudo sh -c “echo ‘SUBSYSTEM=”apex“, MODE=”0660“, GROUP=”apex"’ >> /etc/udev/rules.d/65-apex.rules”

sudo groupadd apex

sudo adduser $USER apex
Then restart the system
sudo reboot
To check if the drivers are working
ls /dev/apex_0
The expected result is that there is no error about invalid location. Now let’s see if there are any other errors.
dmesg | grep apex
The expected result
[5.558661] apex 0000:01:00.0: enabling device (0000 -> 0002)
[10.813764] apex 0000:01:00.0: Apex performance not throttled due to temperature
Now in the documents we create a python virtual environment and activate it
cd Documents

python3 -m venv .venv

source .venv/bin/activate
We install the previously downloaded python libraries.
# pip install <./tflite_runtime>.
pip install ./tflite_runtime-2.17.1-cp311-cp311-linux_aarch64.whl

# pip install <./pycoral>
pip install ./pycoral-2.0.3-cp311-cp311-linux_aarch64.whl
If you get the error ERROR: ... is not a supported wheel on this platform go to troubleshooting section.
Since the pycoral library requires numpy < 2.0 we need to downgrade it
pip install numpy==1.26.4
Check if it works
mkdir coral && cd coral

git clone https://github.com/google-coral/pycoral.git

cd pycoral

bash examples/install_requirements.sh classify_image.py

python3 examples/classify_image.py }
--model test_data/mobilenet_v2_1.0_224_inat_bird_quant_edgetpu.tflite }
--labels test_data/inat_bird_labels.txt }
--input test_data/parrot.jpg
You should see results like this:
INFO: Initialized TensorFlow Lite runtime.
----INFERENCE TIME----
Note: The first inference on Edge TPU is slow because it includes loading the model into Edge TPU memory.
11.8ms
3.0ms
2.8ms
2.9ms
2.9ms
-------RESULTS--------
Ara macao (Scarlet Macaw): 0.75781
If it returns the error ValueError: Failed to load delegate from libedgetpu.so.1 go to troubleshooting section.
Troubleshooting
Incompatible versions of python libraries
ERROR: tflite_runtime-2.17.1-cp312-cp312-linux_aarch64.whl is not a supported wheel on this platform.
The cp312 fragment means that this is a library for python 312 (3.12) and the linux_aarch64 fragment indicates the architecture type.
The error indicates a mismatch between the python version in the environment and the library version. Go to the linked repositories and download the files corresponding to your python version or CPU architecture.
- Corrected version of libedgetpu library
- Tensorflow Lite binaries
- Revised version of pycoral library and ready-made whl files
- Updated version of gasket-dkms driver
Failed to load delegate from libedgetpu.so.1
This could mean that:
- the accelerator is incorrectly/not connected
- some error in the detection of the accelerator
- wrong permissions
Check dmesg | grep apex.
[5.267530] apex 0000:01:00.0: enabling device (0000 -> 0002)
[5.268361] apex 0000:01:00.0: Couldn't initialize interrupts: -28
[10.298291] apex 0000:01:00.0: Apex performance not throttled due to temperature
if you find the line Couldn't initialize interrupts then you have incorrectly executed the first part of the instruction (aka point 2) and the rpi is not communicating properly with the accelerator. I suggest to start from the beggining…
otherwise it is most likely an permission error. That is, the group is created incorrectly / you do not belong to it. You can install the libraries globally and try to run the script with the preceding sudo.
to proceed with the analysis in other cases follow the steps described here. I wish you good luck!
- rpi’s dead. - ale jak to zdech? tyśgo killim?